Posts tonen met het label MD designer oktober 2016. Alle posts tonen

Bonus project Remember Wishes & Kisses


This is the last project in the series Designer of the month for Marianne Design. 


I have made a video off the whole proces and I hope you like it.


Happy Crafting!
Gerry van der Velden

Bonus project Remember Wishes & Kisses


Dit het laatste project in de serie Designer van de maand voor Marianne Design. 


Ik heb een video gemaakt van het proces en ik hoop dat jullie het leuk vinden.


Veel knutselplezier!
Gerry van der Velden

3D village in the forest #8

Today I want to show you card #4 in the series Marianne Design designer of the month. It's already the last card in these series, time flies when you are having fun:-) I had lots of fun working on these projects, I hope you like them!


With the trees and the village I immediately thought of a 3D card, these are so much fun to make. This card can also be folded flat so it fits in an envelope.


First I cut two cards, 15 x 21 cm. (Score at 3 cm. on both sides)
And yet two strips: one bar of 3 x 17 (score at cm. 1 on both sides.) And 1 strip of 3 x 19 (score 2 cm. on both sides..


From patterned paper, I cut two squares slightly smaller than the card at I cut a square out of the middle, I distressed the edges. Then I taped it to the card.
With a little mat I have cut out a square out of the middle to form a frame.
The other square I glued on the other card.


I have a square cut out of white paper and embossed this with the forest design folder.


Then I applied VersaColor Ink in 3 different color with a sponge in a circular motion. Because of the different layers, you get a super nice depth effect.


I then taped it on the card, both cards are now almost done.


I cut the trees and houses, the houses I taped with a post-it and then inked them to keep the roofs tops white. Then I taped them in front of and behind the strips.


I glued the strips in the rear card and on the front card I have pasted a row of trees and then the card can also be put together.


This is really something you have to try, it's so much fun to make!

Happy Crafting!

Gerry van der Velden

3D dorpje in het bos #8

Vandaag wil ik jullie kaart #8 in de serie Marianne Design designer van de maand laten zien. Het is alweer de laatste kaart uit de serie, de tijd vliegt als je lol hebt:-) Ik heb het met veel plezier aan deze projecten gewerkt, ik hoop dat jullie het leuk vonden!


Met de bomen en het dorpje moest ik meteen aan een 3D kaart denken, die zijn ook zo leuk om te maken. Deze kaart kan ook nog plat gevouwen worden dus hij kan ook in een envelop.
Als eerste heb ik 2 kaarten gesneden, van 15 x 21 cm. (3 cm. rillen aan beide kanten)
En nog 2 repen: 1 reep van 3 x 17 (1 cm. rillen aan beide kanten) en 1 reep van 3 x 19 (2 cm. rillen aan beide kanten.


Uit dessinpapier heb ik 2 vierkanten gesneden iets kleiner dan de kaart, bij een heb ik uit het midden een vierkant gesneden, de randen heb ik opgeruwd. Dit heb ik op de kaart geplakt.
Met een klein randje heb ik een nog vierkant uitgesneden in het midden zodat een frame ontstaat.
De andere heb ik op de andere kaart geplakt.


Ik heb een vierkant gesneden uit wit papier en dit geëmbost met de forest design folder.


Daarna heb ik met 3 kleuren Versacolor inkt aangebracht met een sponsje in een draaiende beweging. Door de verschillende lagen krijg je een superleuk diepte effect.


Ik heb het daarna op de kaart geplakt, beide kaarten zijn nu zover klaar.


De bomen en huisjes heb ik gestanst, de huisjes heb ik afgeplakt met een post-it en daarna geïnkt zo blijven de daken wit. Daarna heb ik ze voor- en achter de repen geplakt.


De repen heb ik in de achterste kaart geplakt, op de voorste kaart heb ik nog een bomenrij geplakt en dan kan de kaart verder in elkaar gezet worden.


Dit is echt iets wat je een keer moet proberen, dit is zo leuk om te maken!

Veel knutselplezier!

Gerry van der Velden

Snow landscape card #7


We are already to card #7 in the series Marianne Design designer of the month.
With the nice pictures of Tiny's winter sheet you have a good base, good for an instant winter feeling.


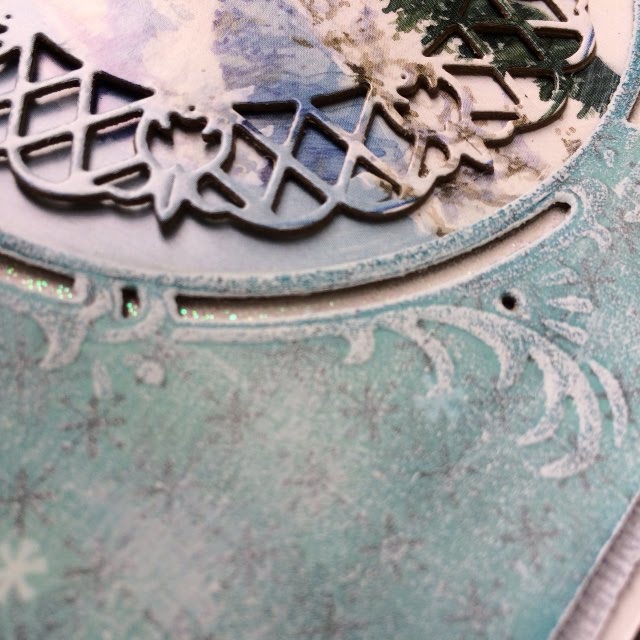
I cut Anja's circle out of a sheet of Eline's paper bloc silverstar and then 2 times out of kraft paper. I glued the layers together. After that I applied gesso with the dry brush technique to bring out the embossing parts more.


I cut out two pictures from Tiny's wintervel.
The biggest I've glued behind the circle and it fits perfectly, very handy!


The little picture I cut out with the doily-like inner circle and also 2 times out of kraft paper, the layers I glued together.


Behind the small lines next to the circle I glued snow paper.
And behind the rest of the open details I glued a dark sheet from the paper block.


The whole I taped on two slightly larger sizes and different colors Papicolor paper and all together on a Kraft Card.

Happy Crafting!
Gerry van der Velden

Sneeuwlandschap kaart #7


We zijn alweer toe aan kaart #7 in de serie Marianne Design designer van de maand.
Met de leuke plaatjes van het Tiny's winter vel heb je een leuke basis, goed voor een instant winter gevoel.


Anja's cirkel heb uit een vel van het Eline's silver star papierblok gestanst en daarna nog 2 keer uit kraft papier. Ik heb de laagjes op elkaar geplakt. Daarna heb ik met gesso de dry brush techniek gedaan om de embossing gedeeltes beter uit te laten komen.


Ik heb 2 plaatjes uitgeknipt uit het Tiny's wintervel.
Het grootste heb ik achter de cirkel geplakt en het past precies, heel handig!


Het kleine plaatje heb ik gestanst met de doily-achtige binnenste cirkel en ook nog 2 keer uit kraftpapier, de laagjes heb ik op elkaar geplakt.


Achter de lijnen om de cirkel heb ik snow paper geplakt.

En achter de rest van de opengewerkte gedeeltes een donker vel uit het papier blok.


Het geheel heb ik op 2 kleuren Papicolor papier geplakt en het geheel op de Kraftkaart.

Veel knutselplezier!
Gerry van der Velden

Hedge hogs and woods card #6


Today I want to show card #6 in the series Marianne Design designer of the month.
With cute animal picture Mattie's winter animals as center and a "wooden plank" background with a twist. It is the most simple card in the series, I think, though I could not help making a pile again:-)


I have a sheet of paper from the Canadian fall block distressed the edges and glued it to a Kraft 
card .


Then I cut strips from the wood print paper, from 3 strips I have distressed the edges, the other two strips I embossed with te design embossing folder and then lightly sanded it to bring out the relief better. 

I'm really fond of embossingfolder and I think it's great fun to use different techniques for getting a different look.


I taped the strips to the card, the embossed strips I cut through the middle to make them fit exactly to both sides.


I cut out the hedge hog picture and glued it on Papicolor paper and cut it out as a mat.


I always like to do things just a bit different, this is the third card with the Christmas tree die and I used it not once as tree :-)
Then I cut the quarter circles with christmas tree die, and I cut them into 3 pieces. I divided and glued them behind the circle.
I lightly sanded the edges.


I wrapped a piece of rope around the card and taped it to the front, on the I took a short rope to tie it together and glued it so that the inside also has a nice finish.


The picture I have glued to the card with a hot glue gun, so it seems to float slightly.


Finally I made a bow and glued it under the picture.
And on top of that a flower, which I colored with spray.

Happy Crafting!

Gerry van der Velden