
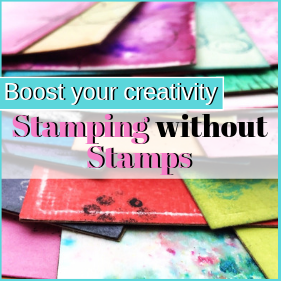
Hallo lieve knutsel vrienden, vandaag heb ik heel veel verschillende voorbeelden met ink smooshing technieken. Een super leuke manier om kleur aan te brengen op je papier. Ik heb de gewone ink smooching techniek gebruikt maar ook een paar nieuwe manieren.
Hi lovely crafty friends, today I have lots of different examples with ink smooshing techniques. A super fun way to add colour to your paper. I used the regular ink smooching technique but also a few new ways.
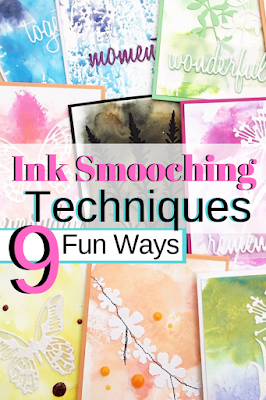

De techniek heeft verschillende namen, inkt smooshing, smooching of smudging maar het is allemaal het aanbrengen van inkt met plastic, meestal met plastic sheet maar hier laat ik ook andere manieren van smooshing zien. Ik heb de verschillende technieken een naam gegeven, op mijn YouTube kanaal in de community tab heb ik kijkers gevraagd leuke namen te bedenken voor nieuwe ink smooching technieken, een aantal zie je hier terug en in de video.
The technique has many names, ink smooshing, smooching or smudging but it's all applying ink with plastic, acetate mostly but here I will show some other ways of smooshing too.
I have given the different techniques a name, on my YouTube channel in the community tab I asked my audience to come up with fun names for the new ink smooching techniques, a number of them you see back here and in the video.
Technique One Double Decker Smoosh

Deze techniek is opbouwen met laagjes vandaar de naam Double Decker.
This technique is building with layers hence the term Double Decker.

Voor deze techniek heb ik de gewone Distress inkt gebruikt, deze inkt is transparant zodat de laagjes beter zichtbaar zijn. De kleuren inkt en producten die ik heb gebruikt voor de kaarten staan onderaan deze post.
For this technique I used the regular Distress inks, this ink is transparent so the layers are more visible. The ink colours and products I used for these cards are at the end of this post.

Technique Two Sloppy Smooch

Een lekker eenvoudige techniek met een leuke rommelig effect.
A super simple technique with a nice sloppy effect.

Hier heb ik een smalle reep plastic sheet gebruikt.
Here I used a small strip of acetate.

Technique Three Reverse Smooch

Laten we alles omdraaien, deze techniek is achterstevoren en geeft ook een heel leuk resultaat.
Lets turn things around, this technique is backwards and also gives a fun result.


De kaarten zijn eenvoudig gehouden met leuke doodles en witte bloemen.
The cards are kept very basic with fun doodles and white flowers.


Technique Four Surprise Smooch

Een leuk onverwacht resultaat krijg je met de surprise smooch.
A fun unexpected result you get with the surprise smooch.


Door plastic folie te gebruiken krijg je meteen wat subtiele textuur op je achtergrond.
By using plastic wrap you get an instant subtle texture on your background.


Technique Five French Smooch

Dit is een variatie op de vorige technique maar dan wat nattere door het gebruik van Oxide inkt sprays.


Uit deze achtergrond heb ik de bloem gestanst en op de tweede kaart gebruikt, zo heb je meteen twee kaarten.
Out of this background I cut the flower and used it on the second card, this ways you get two cards in one take.


Technique Six Folded Smooch

Dit is zo eenvoudig maar geeft een superleuk effect de folded smooch.
This is so simple but gives a superfun effect the folded smooch.


Met heel veel textuur en dat allemaal met maar een laag, dus lekker snel.
With lots of texture and all that with just one layer, so really fast.

En dit is het resultaat van de inkt die achtergebleven was, de tweede keer.
And this is the result of the leftover ink, the second time.

Technique Seven Smooch of Doom

En nu de Smooch of Doom, ik heb de voorgestelde suggestie een beetje aangepast, smooch of death was een beetje te macaber voor knutselen dacht ik:-)
And now the Smooch of Doom, I changed one of the suggestions a bit smooch of death was a bit too macabre for paper crafting in my opinion:-)


Technique Eight Butterfly Smooch

Verder met de volgende techniek, de butterfly smooch, ik ben dol op vlinders dus die moest erbij gewoon als naam.
On with the next
technique the butterfly smooch I love butterflies so I
had to add that one as a name.
Voor deze techniek heb ik maar twee kleuren gebruikt en dat geeft toch een superleuk resultaat.
For this technique I only used two colours and it gives a super fun effect.

Technique Nine Precision Smooch

En nu de laatste techniek de Precision Smooch or Gerry's Smooch. Deze heb ik bedacht toen ik de inkt smooching techniek ergens zag en hoewel ik de look erg leuk vond wilde ik een manier om de inkt op een meer precieze manier aan te brengen op betaalde plaatsen.
Now the last technique the Precision Smooch or Gerry’s Smooch. I thought of this one when I first saw the ink smooching technique somewhere and though I liked the look I wanted a way to add the ink more precise in certain areas

Nog iets anders wat ik aan wilde passen, bij het gebruik van de plastic sheet krijg je altijd een soort van lijn wanneer je het optilt, omdat je het moet buigen om het op te tillen en ik wilde een manier om dat te omzeilen en toen bedacht ik de Precision Smooch.
Another thing I wanted to adjust, when using the
acetate you always get some sort of line when lifting it because you have to bend
it to lift it and I wanted a way to
get around that and that's when I came up with the Precision Smooch.

In de video laat ik de verschillende technieken zien van de misschien bekende technieken tot leuke nieuwe manieren om te smoochen. Veel kijkplezier!
In the video I show you different techniques from the techniques you may know to some fun new ways to smooch. Have fun watching!
Ben je nog geen abonnee op mijn YouTube kanaal, abonneer je dan gratis, dat vind ik echt leuk! Alvast bedankt en bedankt voor je bezoek!
If you are not yet a subscriber to my YouTube channel, subscribe for free, I really appreciate it! Thanks in advance and thanks for stopping by!
There are some affiliate links below, which means I may receive a small commission, at no cost to you, if you make a purchase through a link. Thank you so much for your support!


You got some really great results and a lovely set of cards. I really like the way you used the stitching on those too...super idea! TFS!
BeantwoordenVerwijderenThanks💖You're welcome💖
Verwijderen